
Photo Gear and Technique
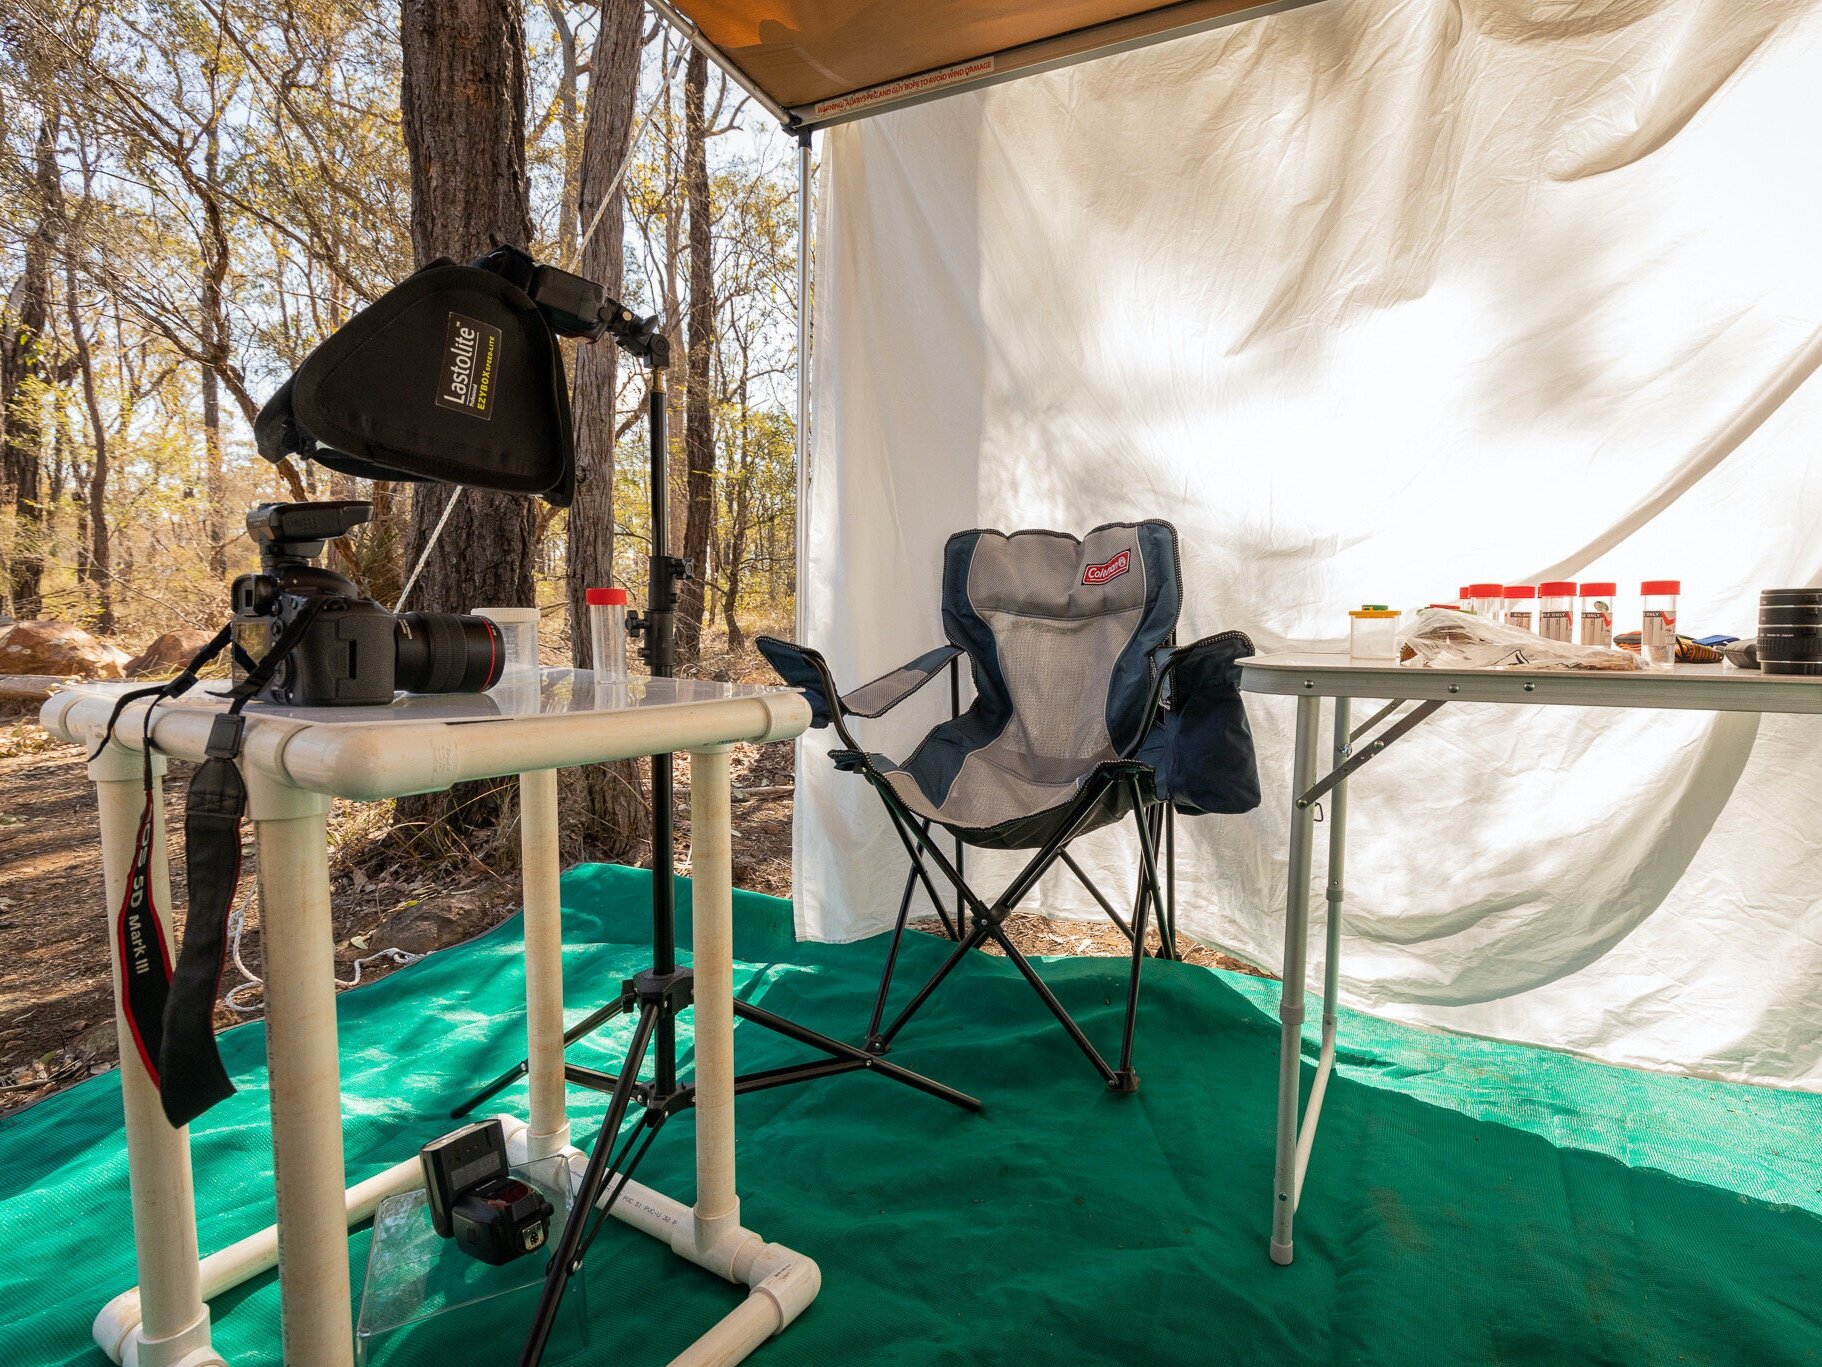

Photo Technique
The tips below might be all you need to get started but I’d also recommend checking out The Field Studio by Niall Benvie. If you’re serious about taking photos on white, in the field, this recently updated ebook is a great place to get inspired and learn more.
Photo Gear
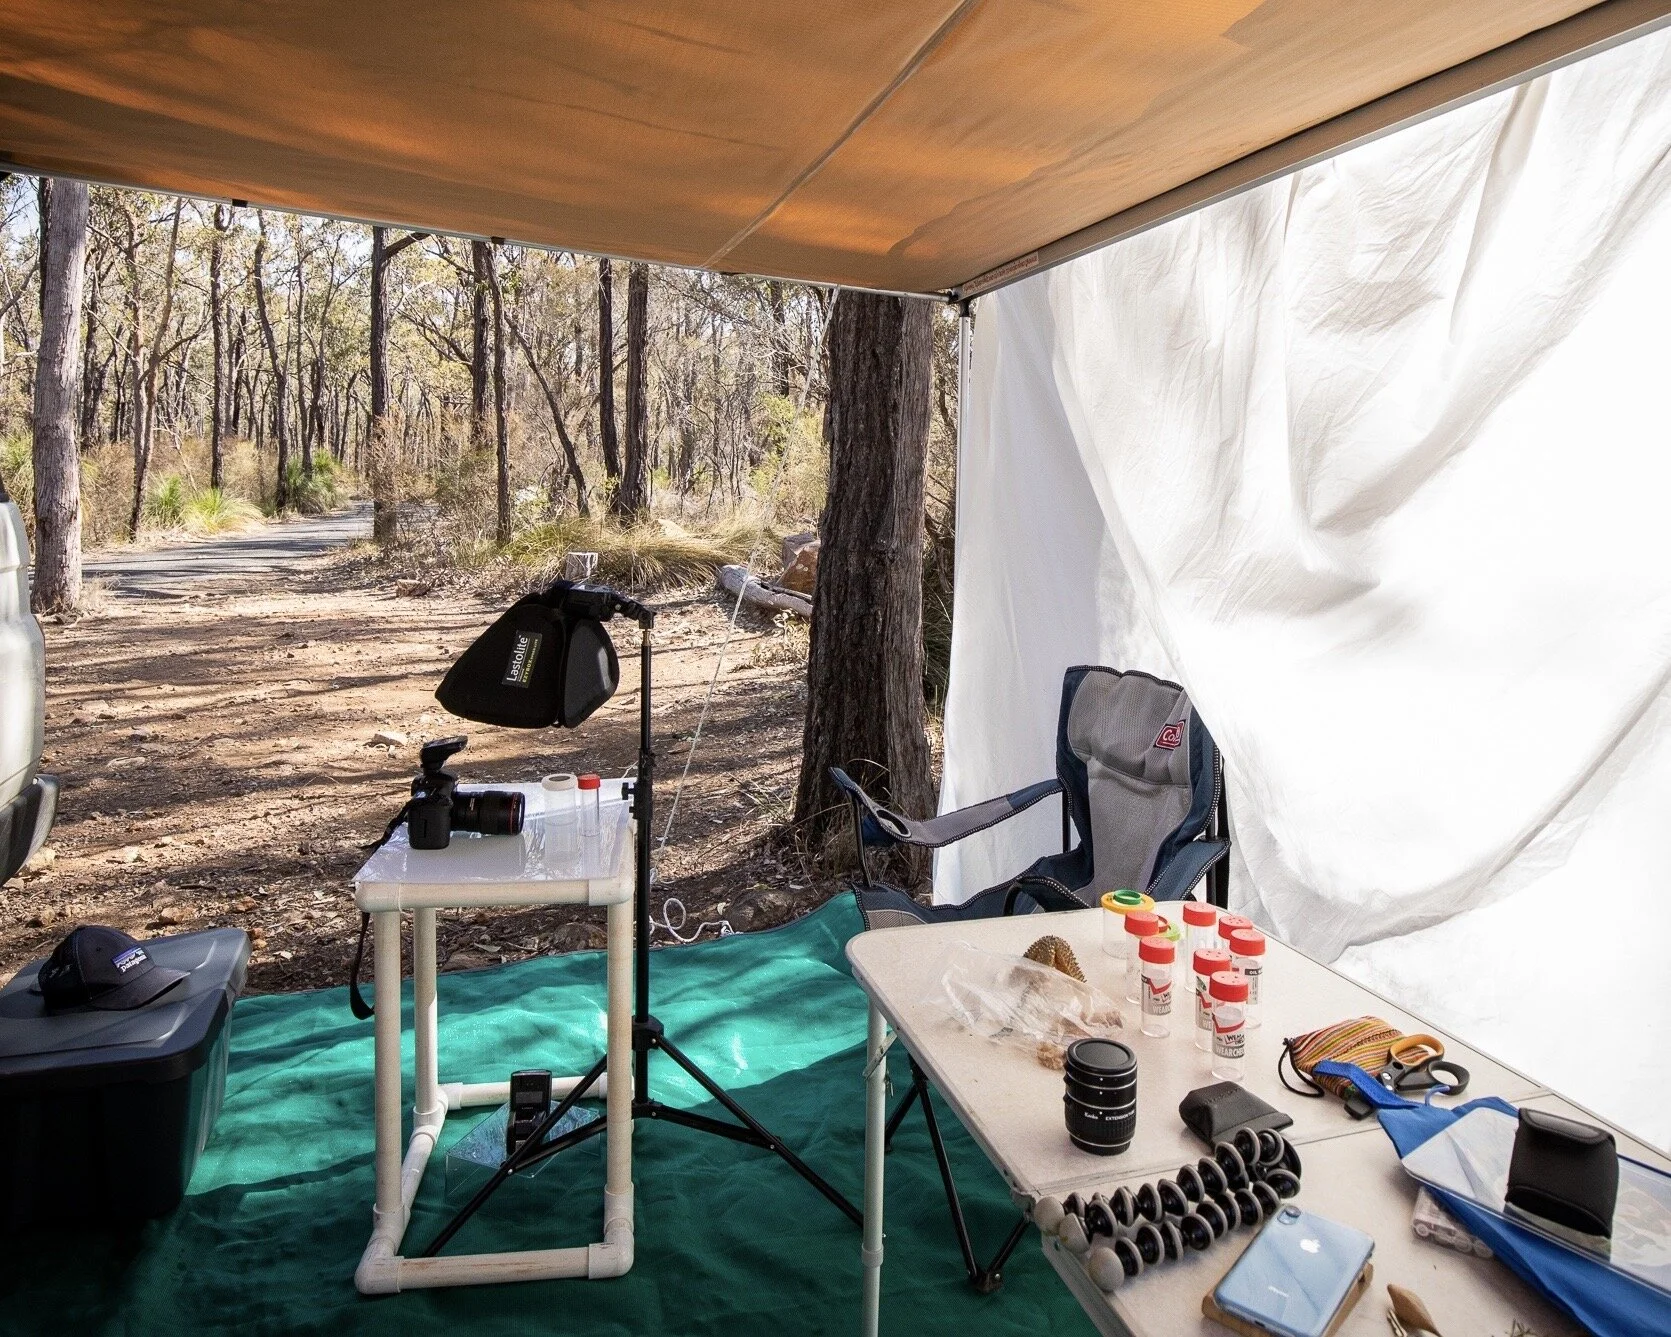
There are dozens of variations that will give similar results. Here’s what’s in my basic kit:
Camera Body: Canon 5D Mark III
Camera Lens: Canon EF 100mm F2.8 Macro lens (Used for 90% of my images)
Two External Flashes: Canon 600 EX-RT Speedlite x 2
One flash for under the acrylic board, the other for lighting the subject from the top
Wireless Trigger: Canon ST-E3-RT Speedlite Transmitter
Flash Diffusion: Lastolite EzyBox Speed-Lite, 8.6 inch / 20cm square
Flash Stand (or a friend to hold the top flash)
White Acrylic board: 594 x 420 mm with a thickness of 3mm to 4.5mm
AA batteries: eneloop rechargeable x 10 minimum
After that, you also need (9.) a method of raising the acrylic board off the ground. Anything can work in a pinch, even two chairs. We constructed a portable table that breaks down for ease of transport. The table is built from PVC pipe using width and length dimensions to match the 594 x 420 mm acrylic board.

Using an almond to test my settings. It’s easier to make exposure adjustments with a stationary subject! A rock or twig will work fine if you don’t have a tiny snack .

Preview of huntsman spider photo as seen from the back of my camera. Note that the background isn’t overly bright. I will use photoshop to edit this later to true white.
Taking the Photo
Aperture
Most of my white background images are taken as a single shot in the f/16 to f/22 range. Keep in mind you run the risk of diffraction with smaller aperture sizes (larger f/numbers). Ideally I would prefer to stay around f/11 and then try to focus stack to maximise depth of field but this is difficult when photographing a living, moving creature. *Note that every lens and camera will be a little different with diffraction so you will have to experiment to get the results you want.
Shutter Speed
When using flash to illuminate your subject you don't need to try and balance natural and artificial light. Shoot at your camera's maximum flash sync speed (mine is 1/200).
Flashes
I always shoot my flashes on manual, usually starting out with each flash set to about 1/4 power and then adjusting up or (more often) down from there. I recommend doing these flash adjustments with a similarly sized stationary object before placing your living specimen on the table.
Keep in mind that flash at a higher power isn’t actually brighter. It just stays lit for longer which can increase the risk of motion blur. In other words: the lower the power, the faster the light burst — so 1/8th power (with a higher ISO) might be needed to freeze fast moving subjects.
If you aren’t happy with your lighting, experiment with the location of your flashes. You might need to raise your bottom flash, add diffusion, find a creative way to bounce light, or change the angle of your top flash to get the results you want.
Composing your subject
My first shot is always the same. I focus on the eye and try and place my camera and lens perpendicular to the subject. By keeping the subject within a narrow plane, you can minimise the risk of lost detail due to too much depth. (Although it’s common to get an out of focus leg or antenna.) I also try to fill the frame with my subject as much as possible.
If I have a cooperative subject I will then try for other angles, always aiming next for a top-down shot which can be essential for species identifications. When shooting straight down, I always increase the power of my top flash in relation to the bottom flash.
Side note - in Niall Benvie’s book, he suggests using the highlight alert in your camera to tell you when you’ve exposed your background to true white - this being the aim. But in my personal experience, I find blown highlights often cause me to lose too much detail in my subject. Instead I prefer to avoid blown highlight alert levels and then spend a little extra time editing in Photoshop.